Refurbishment projects in older homes are a DIY staple. Older homes often come with a list of necessary upgrades. Out of these one of the most satisfying and aesthetically pleasing tasks can be restoring woodwork.
Older homes, particularly period homes, can include features such as neglected floorboards or hardwood doors hidden beneath layers of dirt or lacquer. With some T.L.C. and the right equipment, these elements can be restored to their former glory, breathing an air of timeless elegance into your home. At Beaver Tool Hire we stock an extensive range of tools and equipment for door and floor restoration, as well as for construction and building refurbishment. Get in touch with our friendly team if you would like advice on the best equipment for your project.
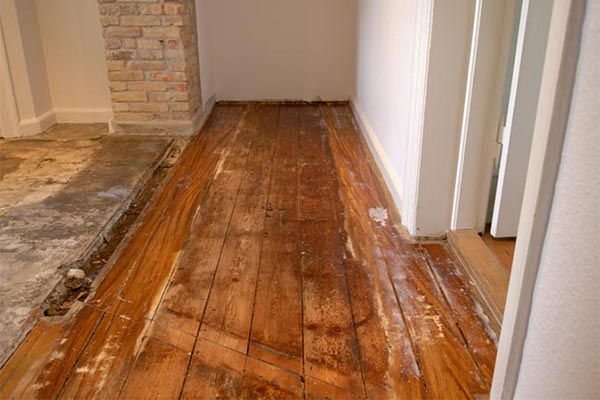
Steps to restoring the woodwork in your home
The entire process of refurbishing a floor can take from a couple of days to weeks, depending on various factors such as the floor area and the condition of the wood. The process usually involves various stages:
- Preparation
- Optional removal of skirting boards
- Repair of damaged areas of the floor
- Sanding
- Cleaning
- Applying finish.
Other tasks such as refurbishing skirting boards and door frames may also have to be factored in.
Our tip
Have various sanders at hand, including an orbital floor sander, a belt sander, and an edge sander. Before starting the project, decide upon what type of finish is best suitable for your floor and ask for advice on achieving the desired finish.
Remember that…
The sanding process will create a lot of sawdust, which must be completely removed before applying the floor finish. Therefore, it’s better to prevent dust accumulation from the start during your floorboard or door restoration process. To help achieve this, clear the entire area of furniture and other items before beginning work. Curtains and picture frames must be removed and vents or items such as thermostats must be covered using painter’s tape and plastic.
Good ventilation will prevent dust from accumulating, and using sanders with dust extraction systems will deal with most of the sawdust. It’s advisable to have a vacuum cleaner at hand or a Hilti dust extractor. A mask designed to prevent the inhalation of dust particles is highly recommended as they can cause damage to the lungs.
Removing skirting boards
Unless a skirting board is damaged and needs to be replaced, it usually does not need to be removed for a sanding project, as edge sanders like the Bona CombiEdge are designed to sand close to skirting boards without causing damage. Nevertheless, a skirting board may sometimes be damaged beyond repair.
To remove skirting boards use tools such as a crowbar, hammer, chisel and box cutter. A box cutter can be used to separate the board from the wall as there may be paint binding them together. A crowbar or a chisel can be used to lever the board from the wall, starting in the middle and moving carefully off to the sides, so as to not put strain on the wood. A hammer can be used to aid in the process, though care should be taken.
Our tip
After removing the skirting board, it is important to make sure there are no nails or damaged wood on the surface that could catch onto the sanders.
Sanding
During the sanding stage old varnish will be removed from the wood using a variety of sanders and sandpaper of various grits, leaving behind a smooth and even surface for new varnish.
Sandpaper can be coarse, medium or fine grit, indicated with a number that shows the size of the abrasive materials on the paper. A lower number indicates a larger size of abrasive material, making the sandpaper coarse, while a higher number indicates finer sandpaper. It is important to start with a coarse grit (such as 40 grit) and move to a finer grit when sanding (100 grit). While different types of wood have different properties, it is generally important to go in the direction of the grain.
There are various sanders for different door and floorboard restoration applications, most importantly belt sanders and orbital sanders. Many are equipped with dust extraction systems:
- Belt sanders are designed to remove material such as finish, or to remove damaged wood, they can be walk-behind floor sanders or handheld sanders.
- Orbital sanders use a rotating motion to achieve a smooth finish, and are usually used with finer grit sandpaper. They are also available as hand held orbital sanders or walk-behind sanders.
- Random orbital sanders are designed to achieve smooth finishes with no swirl marks or other imperfections.
- Edge sanders such as the Bona CombiEdge are designed to sand the edges of the room.
Our tip
Machines can be walk-behind or hand held. A walk behind belt sander is ideal for a floor that is in particularly bad condition and a handheld belt sander can be used for damaged areas of wood or to remove thick finishes. A walk-behind orbital floor sander on the other hand is the perfect choice for achieving a smooth finish.
Cleaning during and after sanding
While sanding it is crucial to keep the area as clean as possible to reduce dust accumulation. Our Bona Flexisand can be coupled with a Hilti VC40 dust extractor, and our other sanders come with dust extraction fittings or dust bags, saving time on cleaning. After sanding it is important to vacuum the entire area and other areas of the house since even small amounts of dust can compromise the end result of the floor finishing process. The Hilti dust extractor, with a 34 kg capacity, can be used to speed up this process.
Our tip
After vacuuming, a damp cloth can be used to remove dust from any remaining surfaces other than the floor. To wipe the floor use a tack cloth, designed to remove loose particles of dust, dirt and lint.
Finishing
Wood floors need to have some form of protection to prevent wear and tear, and that is what finishes achieve. Quick drying water based polyurethane finishes can be used, which leave little odour and provide a clear finish, or a slower drying oil based polyurethane finish might be preferred. Oil based finishes need fewer coats, leave a richer appearance, and require less maintenance over time.
Our tip
When applying a coat of finish, it is important to not stop until the area is finished for optimal results. Furthermore, not all areas of the floor will soak up the finish at the same rate. Coats should be added as needed, depending on the finish being used.
Refurbishing doors, skirting boards and door frames
Handheld belt sanders and orbital sanders are ideal for refurbishing tasks or detail work.Use these with dust extraction fittings or dust bags to keep the area as clean as possible. Random orbital sanders are ideal for doors, as they leave no marks.
These tasks should not be carried out until the varnish on the floor is completely dry, as dust particles can compromise the quality of the end result.
Choose Beaver Tool Hire for Sanding Equipment Hire
Interested in sanding equipment hire for your door or floorboard restoration project? Speak to Beaver Tool Hire today. With branches in Chichester, Petersfield, Waterlooville, Portsmouth, Fareham, Winchester and our newest depot in Worthing we are conveniently located to provide leading tool and equipment hire services throughout Hampshire and West Sussex.
Get in touch with your nearest branch today to find out about the tool hire solutions for your project. Our friendly team is always happy to help.
Beaver Tool Hire branches:
Chichester Branch
Phone: 01243 782510
Email: hire@beavertoolhire.co.uk
Petersfield Branch
Phone: 01730 264804
Email: hire@beaverpetersfield.co.uk
Waterlooville Branch
Phone: 023 9225 9325
Email: hire@beaverdenmead.co.uk
Portsmouth Branch
Phone: 023 9266 3599
Email: hire@beaverportsmouth.co.uk
Fareham Branch
Phone: 01329 233731
Email: hire@beaverfareham.co.uk
Winchester Branch
Phone: 01962 790369
Email: hire@beaverwinchester.co.uk
Worthing Hire Desk
Phone: 01903 323331 / 07355 674080
Email: hire@beaverworthing.co.uk